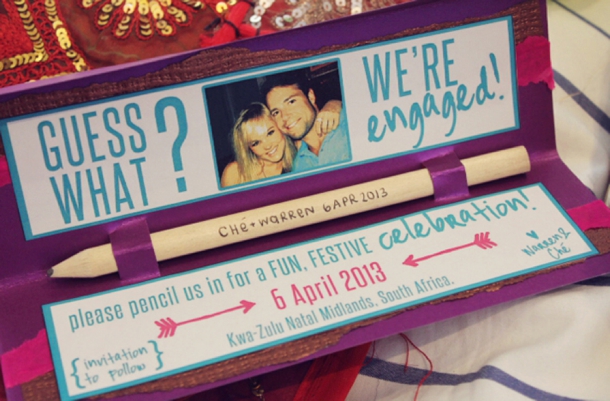
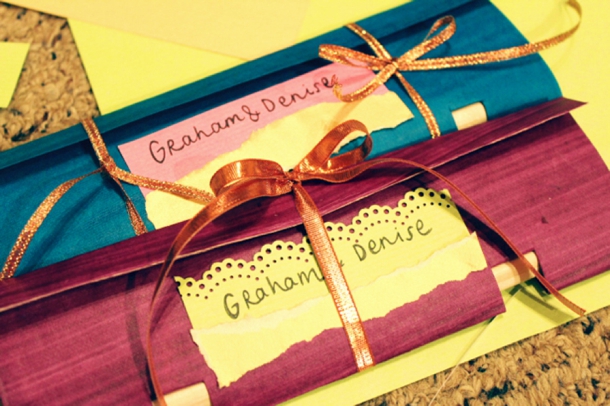
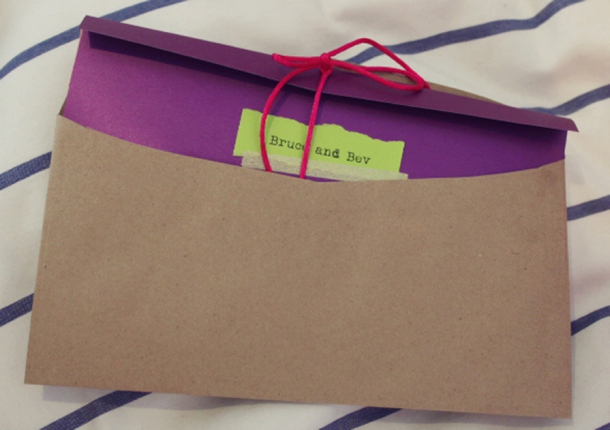
Oh we do love a DIY bride. And we especially love her when she’s our friend Che and she just happens to run a supercool South African blog called Indieberries, with cartoons and stuff. See, Che reminds me of my friend Marcelle. In Std 2, she pitched up at our school, and everything she touched turned to perfection. Her handwriting was awesome. She could draw. Her projects looked like professional scrapbooks. When she covered her compass tin with pictures it looked SO COOL (seriously, in the late ’80s that was a thing). She was like Regina George with the cutout t-shirt, but whenever I tried that stuff, it just looked ridiculous. So when Che got engaged, I knew that her guests would be treated to lots of creative, handmade, scrapbooky details that only she could put together, and I bought her wine and made her promise to send them to me. So here they are! Che’s Save the Dates are beyond cute – they’re based around the idea of ‘pencilling the date in’. I especially love that she wanted their guests to have something physical to open and use, like a present. Can you imagine getting one of these? You’d automatically be amping for the wedding, right? Anyway, you can read the thought behind these invites on Che’s awesome blog, or read on below for all the best Indieberries DIY tips. Oh, and pssst, if you’d like to read her and Warren’s story, see their adorable engagement shoot here.
*********************************************************
Che’s Tips for DIY
Finalise your numbers and lists before you start
When you outsource the printing of invites/name cards/menus/programs, etc. you will need to give your stationer a list of final numbers, so that they can determine the exact cost and the correct numbers and names for all your guests. When you DIY your own stationery, you run the risk of not completely finalising your guestlist and numbers from the outset because you can always “make an extra one” here and there. Which of course creates problems when you suddenly need to find more stock of a specific kind of ribbon when the craft store down the road has run out. Which brings me to…
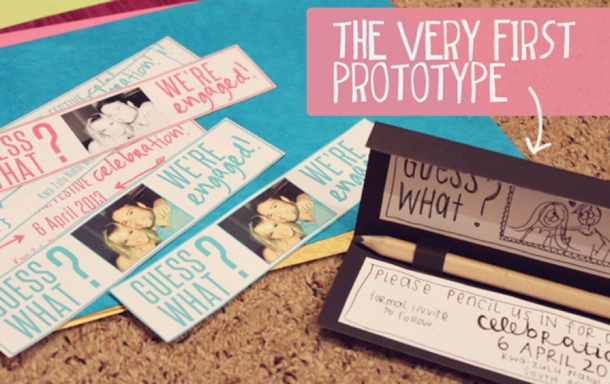
Play around with prototypes
The joy of doing things DIY is that YOU are in control of what you are doing. Use this to your absolute advantage. Play around with different ideas, use different colours, try ideas or combinations that you didn’t think you would like. When you are getting the basic idea down, you can use whichever materials are around (I used a piece of black cardstock and regular printer paper and a pen to mock up my ideas) but once you are happy with those then use some samples of the actual papers/colours/ribbons/buttons/beads you will be using. It is important to “test-run” how your DIY will look before you run off and buy 5 km of ribbon. Ask your bridesmaids/family members/friends what they think (AND! if you think he will know the difference between mauve magenta and maroon – you can even ask your FIANCE!). It is always nerve-wrecking to show your personal creations to others – particularly if they are slightly more “alternative” but remember that your family and friends should have your best interest at heart – so be receptive to what they say about your prototypes. But also, having said that, pick who you are going to show very carefully.
When buying your DIY bits and pieces check that enough stock is available
If you are making your own wedding stationery and you are buying your craft supplies from various craft shops – it is very important that you find out from the shop owners how much stock of each item they currently have and which supplies can be re-ordered. If you will have to re-order a particular item, you should also make sure you know how long it will take to re-order that specific item. As well as checking for discontinued lines, it is also worth asking for a wholesale discount if you are buying large quantities of anything.
Enlist the help of others
Perhaps you are the DIY/crafty guru of the family and you don’t quite trust your 60 year old auntie to hand-letter your envelopes in the way you would like – but it is always useful to get help with DIY projects. Break down the DIY into different tasks which can be given to other family members. Decide which tasks require you specifically and which tasks can be delegated to others. Perhaps you wouldn’t like your auntie to hand-letter your envelopes, but she could help seal them and add stamps. Most of your family and friends will be happy to help – and it can be quite fun to get a production line going. Remember – you will need to relinquish a certain amount of control in order for this to work successfully. And in any case, which is more important to you – having your ribbons tied at an exact 47 degree angle or having your closest family and friends share in the build up towards your big day?
Finish the mini tasks first and work consistently
If a particular DIY project requires several mini tasks before it can be finally assembled, make sure you complete all the mini tasks before putting everything together. I have found a few benefits to doing it this way:
- Having all the mini tasks (aka gruntwork) completed before you start assembling makes the task go much quicker.
- It is easier to delegate the smaller (aka gruntwork) tasks to family and friends.
- Working on several mini tasks simultaneously helps to keep it interesting for you. You will also start to notice if you
are running low on any particular supply. But by having several mini tasks – you will be able to work on another aspect
of your DIY while you wait on getting new supplies.
Seeing your final product come together can be very rewarding and giving yourself this “reward” too early on will make it difficult to keep yourself motivated. Let’s say you have 100 invitations to make and each invitation consists of several “bits and pieces” that need to be assembled. If you finish only ten “bits and pieces” and then start assembling those ten invitations, you will feel so mighty proud of yourself that you will likely spend the next few days “taking some DIY-time off”, basking in the glory of your first ten invitations. It is much harder to force yourself to then go RIGHT back to the beginning and start making all the “bits and pieces” all over again. Finish all the nitty-gritty before you start. Just trust me on this one.






Comments are closed.