Hot Chocolate Bar & Printable Sign by Pen and Paper Flowers
One of the things I love most about winter weddings, whether you’re having them in some snowy cabin in the mountains of Canada, or in our more temperate climate (not that it feels that way at the moment!), is that you can bring in details that are really cosy, to give your guests that comfy, wrapped up feeling. From blanket favours to hot drinks, it’s a great way of pampering them and using the chilly weather to your advantage. And speaking of hot drinks, a hot chocolate bar has to be one of my favourite kinds of details! I mean, who doesn’t love a delicious, warming cup of cocoa, especially when it comes with all the trimmings. So today I thought I would break it down into simple steps, so you can easily create your own (and make it beautiful!) Links in bold denote sponsored affiliate links. SouthBound Bride may earn a commission if a sale is made.
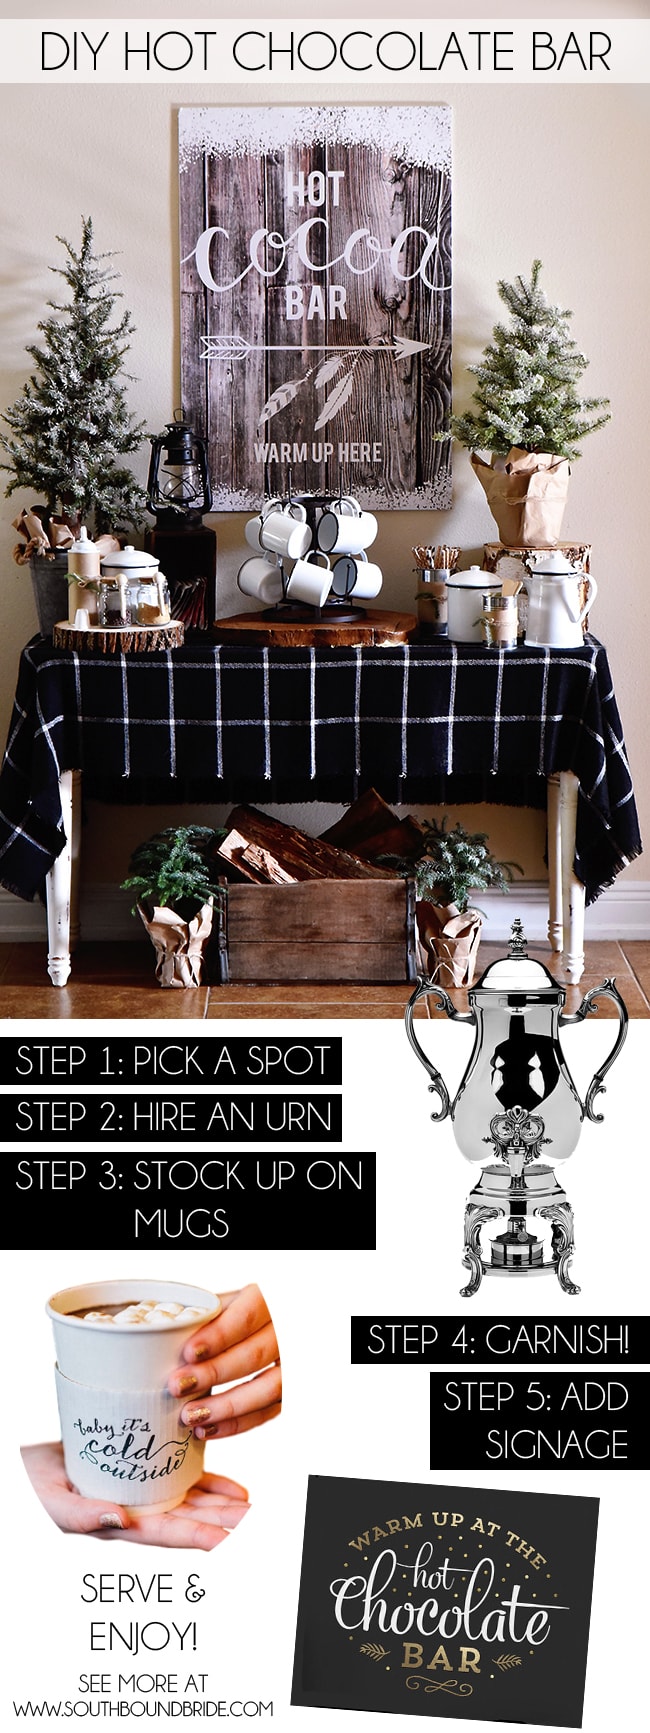
Step 1: Pick a Spot
When you’re checking out your venue and planning your reception layout, make sure you scout out the perfect corner to put your hot choc bar. You’ll want it to be central enough to the action so that everyone knows it’s there, but with plenty of room if it gets popular. Find out what furniture options are available – if you can use a vintage dresser or table to set it up, for example, it’ll help to make it a gorgeous feature. A simple table is fine too, but you’ll need to add that little something extra when you style it (see below).
Ali McLaughlin Photography/Kayla Dreesen via Storyboard Wedding
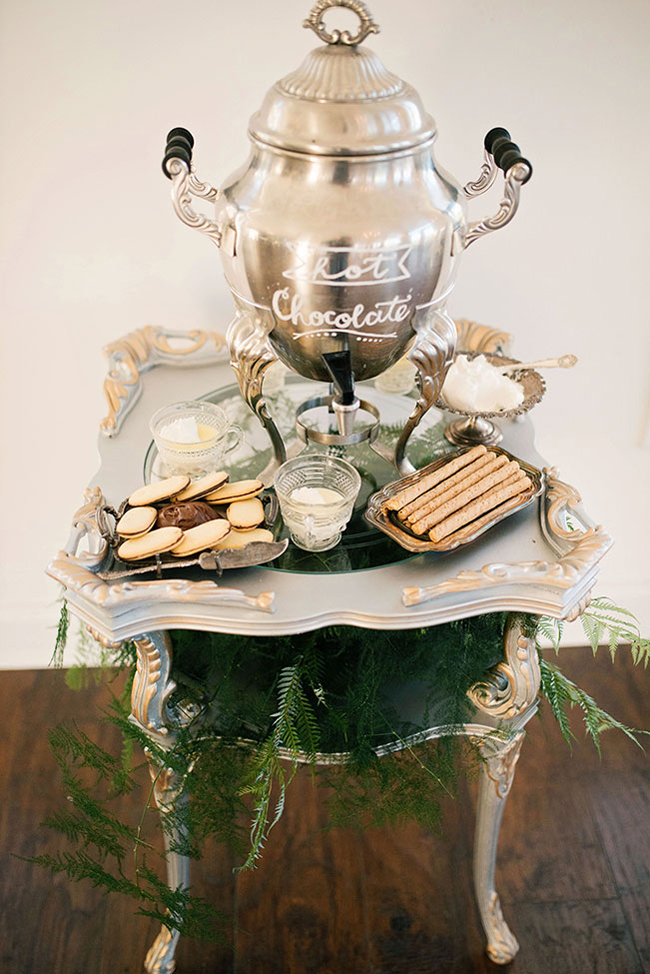
Step 2: Hire or buy an urn
The next step is to chat to your caterer about the recipe, or figure out which one to use if you’re doing it yourself. Taste testing recommended! Once you know that, you’ll need to organise an urn. Depending on the type of hot chocolate your serve (especially the amount of milk used as a base), you may need to adapt how you serve it, so that it doesn’t burn at the bottom. That said, a tea or coffee urn with a tap is the simplest way to serve – and extra styling points if you can find a beautiful vintage urn like the one in the picture above!
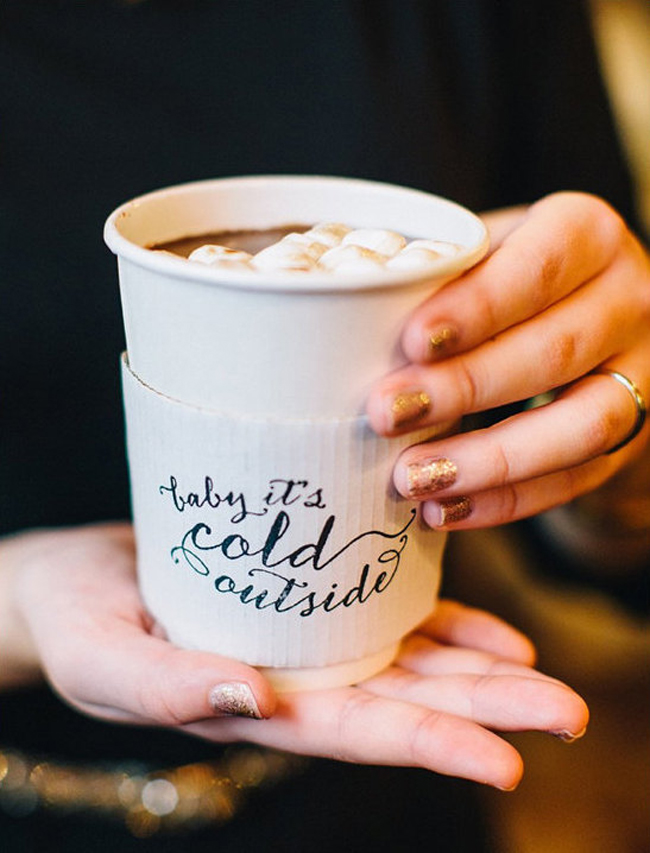
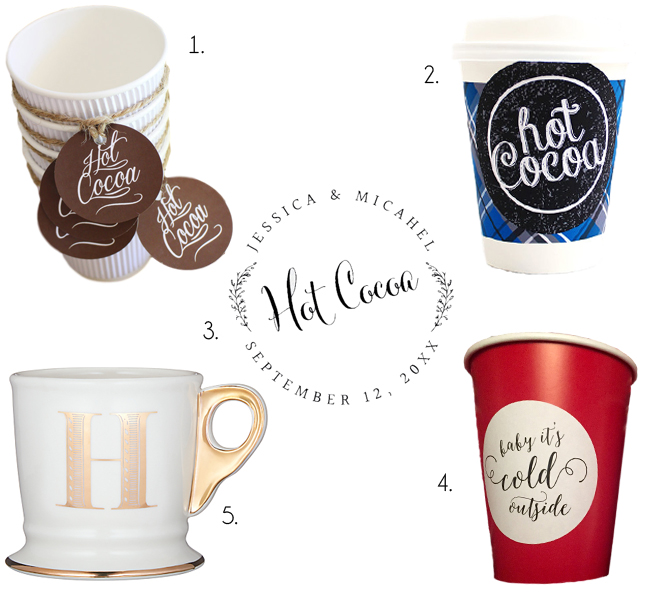
Top: ‘Baby it’s cold outside’ cup sleeves by Confetti Grey (Image by Perry Vaile Photography/Leigh Pearce Weddings) | 1: Printable circle tags by Sweet Scarlet Designs | 2: Plaid printable coffee sleeve | 3: ‘Hot Cocoa’ stamp by Fall For Design | 4: ‘Baby it’s cold outside’ stickers by HH Paper Co. | 5: Anthropologie Gold Monogram Mug
Step 3: Stock up on mugs
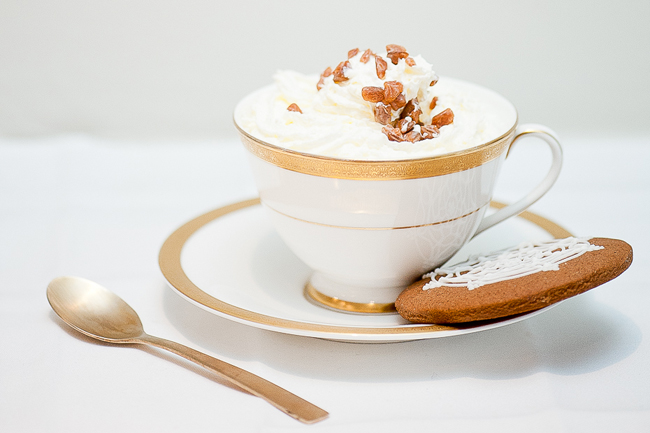
There are quite a few options when it comes to your drinking vessels. You could hire some simple white mugs and dress them up with pretty stirrers or flags. You could buy mugs as favours – perhaps customised with a message or your monogram (there are loads of mug decoration tutorials online if you want to do this yourself). Or you could opt for the paper option – what I like about this is that you can order in your colours, or buy custom sleeves stamped to match your décor. They make a very cute little detail (but be sure to buy environmentally friendly cups).
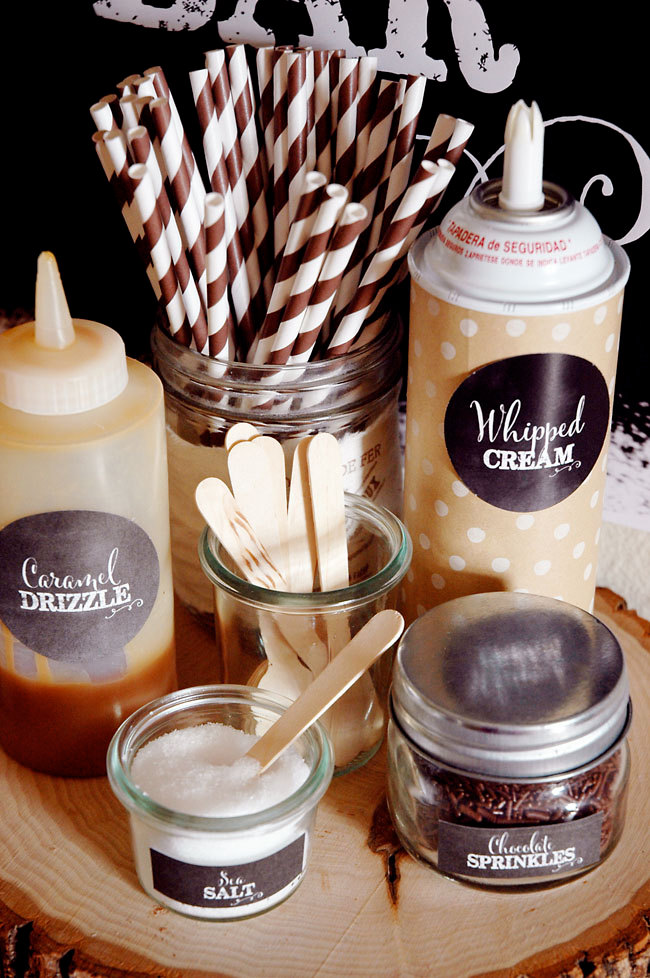
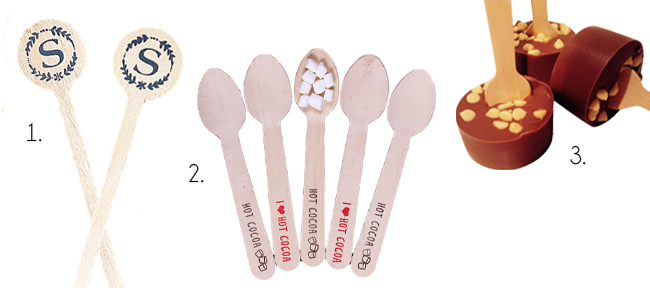
Top: Chalkboard Hot Chocolate Bar Kit by Pen and Paper Flowers | 1: Wooden Stirrers with Monograms by Foglio Press | 2: Hot Cocoa Spoons by The Baker’s Confection | 3: Chocolate Stirrers by Cambridge Chocolates | Bottom: Liesl Cheney/b.loved on SouthBound Bride
Step 4: Garnish!
You can have so much fun with the extras! I mean, plain hot chocolate is great, but imagine what a kick your guests will get out of making up their own variations? Marshmallows are a must, as is whipped cream, and you can pick a variety of sprinkles: chocolate and white chocolate chips, crushed peppermints, fudge or butterscotch, coconut sprinkles, crushed cookies, sea salt (seriously!), cinnamon, grated chocolate, and different types of syrup or drizzle. Serve them from glass jars with pretty spoons, or empty soap dispensers or vinegar pourers for syrups. You can even pretty up a whipped cream spray by wrapping the tube in kraft paper, and tying it with twine. Stirrers are another addition – cinnamon sticks, candy canes (for a touch of Christmas!), pirouette cookies, biscotti, chocolate spoons. So cute!
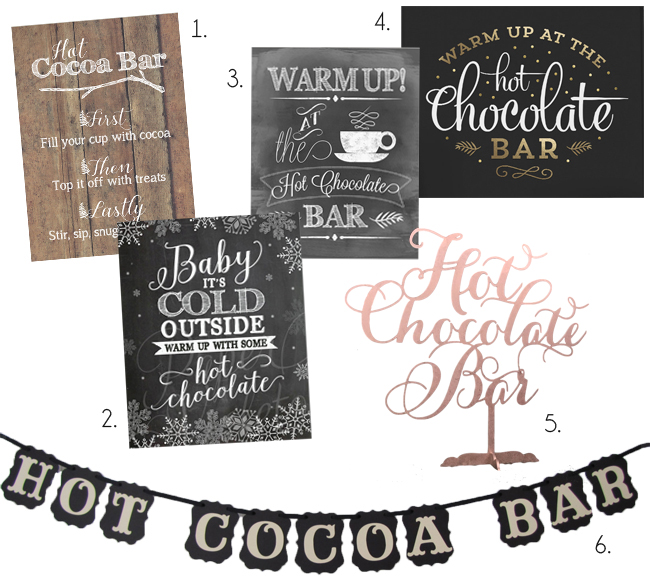
Top: Chalkboard Hot Chocolate Bar Kit by Pen and Paper Flowers | 1: Cocoa Bar Printable by Sweetly Smitten | 2: Baby It’s Cold Outside Sign by The Paper Violet Shop | 3: Hot Chocolate Bar Download by Minimal Moon | 4: Hot Chocolate Bar Sign by The Pretty Paper Studio | 5: Hot Chocolate Bar Table Sign by PS Weddings and Events | 6: Hot Cocoa Bar Banner by Paramore Art Works
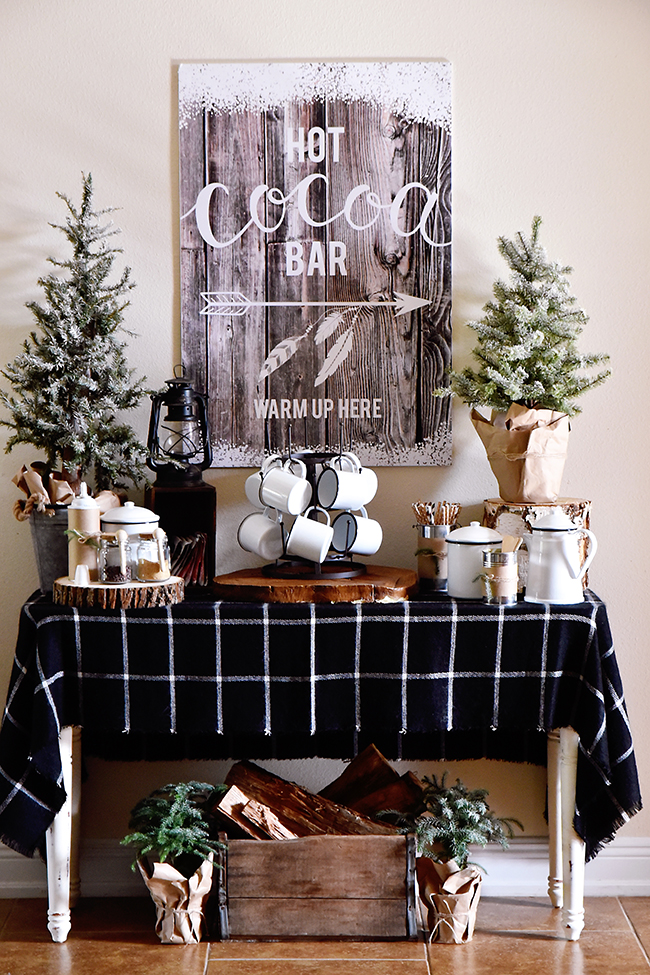
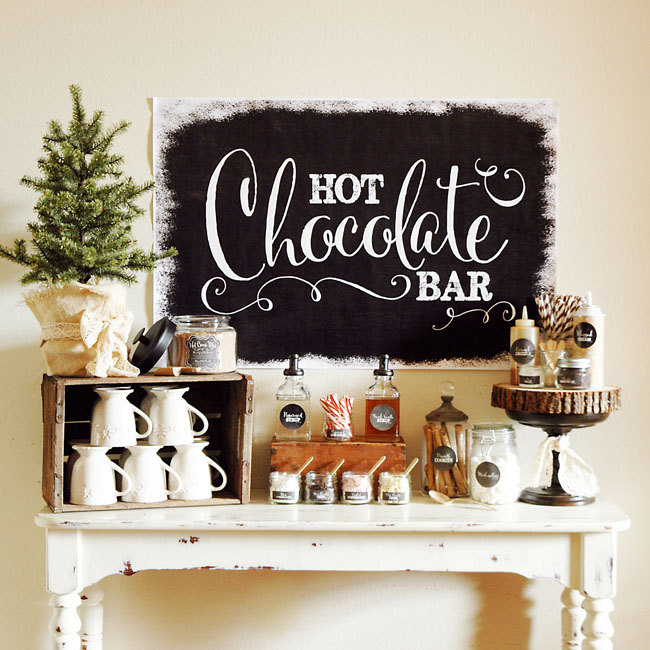
Step 5: Add signage & style
The final step is to bring it all together, using some of the same principles you might use for a dessert display (see our top tips for that HERE). Use crates and boxes, wood slices, and cake stands to add height, a variety of pretty containers to draw the eye, and print off little labels for all the garnishes (you can find some gorgeous complete kits on Etsy). And speaking of signage, make sure you announce your hot chocolate bar to your guests using an eye catching sign – again, you can find loads of lovely printable options on Etsy (I’ve picked my favourites below). As a final element, add in some cosy winter touches – maybe a plaid blanket as a tablecloth, some mini Christmas trees or evergreens, or even a stack of wood. Make it so pretty your guests almost don’t want to touch it… until they can’t resist that smell of warm chocolate, of course!
Top: Hot Chocolate Bar by Pen and Paper Flowers | Urn: Godinger | Cup: ‘Baby it’s cold outside’ cup sleeves by Confetti Grey (Image by Perry Vaile Photography/Leigh Pearce Weddings) | Sign: Hot Chocolate Bar Sign by The Pretty Paper Studio